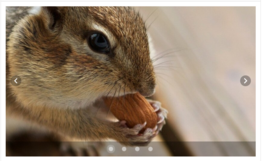
[Vue.js +Vuetify.js] v-carousel를 사용한 이미지 스와이프(swipe)구현하기(프리젠테이션)
이미지 슬라이드를 구현하기 위해 vuetify.js 프레임워크의 Carousels를 사용해보기로 하였다.
기본적인 개발가이드와 구현방법은 아래링크를 참고하면 된다.
Carousel component
The carousel component is used to cycle through visual content such as images or slides of text.
vuetifyjs.com
[기본 템플릿]
<template>
  <v-carousel>
    <v-carousel-item
      v-for="(item,i) in items"
      :key="i"
      :src="item.src"
      reverse-transition="fade-transition"
      transition="fade-transition"
    ></v-carousel-item>
  </v-carousel>
</template>
[스크립트]
<script>
  export default {
    data () {
      return {
        items: [
          {
            src: 'https://cdn.vuetifyjs.com/images/carousel/squirrel.jpg',
          },
          {
            src: 'https://cdn.vuetifyjs.com/images/carousel/sky.jpg',
          },
          {
            src: 'https://cdn.vuetifyjs.com/images/carousel/bird.jpg',
          },
          {
            src: 'https://cdn.vuetifyjs.com/images/carousel/planet.jpg',
          },
        ],
      }
    },
  }
</script>
[실행 화면]

언제나 그랬듯 기본적인 개발가이드로는 기획자가 요구하는 기능은 구현하기 까다롭다.
PC 화면에서는 마우스 터치를 이용한 스와이프가 되지 않고
왼쪽 오른쪽에 나타난 버튼을 이용해서 슬라이드를 넘겨야한다.
모바일에서는 좌우 스와이프시 잘 된다.
또 한 touch 속성 역시 모바일에서만 적용된다.
시간을 또 날렸다.
삽질로 터득한 지식은 기억에 오래가서 좋지만
개발할 시간이 부족하다.
          <v-carousel
            hide-delimiter-background
            :hide-delimiters="false"
            :continuous="false"
            light
            :touch="{
              left: () => swipe('Left'),
              right: () => swipe('Right'),
              up: () => swipe('Up'),
              down: () => swipe('Down')
            }"
            @change="direction"
          >
PC에서도 동일하게 좌우 스와이프를 마우스를 이용해서 하려면 기본 가이드로는 불가능하다.
아래 코드를 활요하면 구현이 가능하다.
<div id="app">
  <v-app id="vapp">
    <v-carousel ref="myCarousel" hide-delimiters :touchless="true">
      <v-carousel-item v-for="(item,i) in items" :key="i" :src="item.src"></v-carousel-item>
    </v-carousel>
  </v-app>
</div>
<v-carousel 옵션으로 :continuous=”false” 처리하거나
show-arrows를 false처리하게되면 querySelector값을 찾을 수 없어 오류가 발생함으로 주의한다.
new Vue({
  el: "#app",
  vuetify: new Vuetify(),
  data() {
    return {
      move: [],
      drag: false,
      touch: false,
      items: [
        {
          src: "https://cdn.vuetifyjs.com/images/carousel/squirrel.jpg"
        },
        {
          src: "https://cdn.vuetifyjs.com/images/carousel/sky.jpg"
        },
        {
          src: "https://cdn.vuetifyjs.com/images/carousel/bird.jpg"
        },
        {
          src: "https://cdn.vuetifyjs.com/images/carousel/planet.jpg"
        }
      ]
    };
  },
  methods: {
    logic(e) {
      let currentMove = this.touch ? e.touches[0].clientX : e.clientX;
      if (this.move.length == 0) {
        this.move.push(currentMove);
      }
      if (this.move[this.move.length - 1] - currentMove < -100) {
        this.$refs.myCarousel.$el
          .querySelector(".v-window__prev")
          .querySelector(".v-btn")
          .click();
        this.drag = false;
        this.touch = false;
      }
      if (this.move[this.move.length - 1] - currentMove > 100) {
        this.$refs.myCarousel.$el
          .querySelector(".v-window__next")
          .querySelector(".v-btn")
          .click();
        this.drag = false;
        this.touch = false;
      }
    }
  },
  mounted() {
    // For touch devices
    this.$refs.myCarousel.$el.addEventListener("touchmove", (e) => {
      this.drag = false;
      this.touch = true;
      this.logic(e);
    });
    window.addEventListener("touchend", (e) => {
      this.move = [];
    });

    // For non-touch devices
    this.$refs.myCarousel.$el.addEventListener("mousedown", (e) => {
      this.drag = true;
      this.touch = false;
      this.logic(e);
    });
    this.$refs.myCarousel.$el.addEventListener("mousemove", (e) => {
      this.drag ? this.logic(e) : null;
    });
    window.addEventListener("mouseup", (e) => {
      this.drag = false;
      this.touch = false;
      this.move = [];
    });
  }
});
[REFERENCE]
[참고하면 도움될 연관자료]
- https://stackoverflow.com/questions/59759113/how-to-implement-vuetify-touch-prop-in-the-carousel-thanks
- https://han-um.tistory.com/9
- https://stackoverflow.com/questions/59126499/how-to-implement-touch-prop-in-window-component-in-vuetify
- https://vuetifyjs.com/en/directives/touch/#usage


