[SwiftUI] Spacer 뷰 기본 사용방법 및 예제
Spacer는 뷰 사이의 간격 또는 뷰의 크기를 확장할 때 사용되는 레이아웃을 위한 뷰입니다.
Spacer 특성
- 스택 외부에서 사용될 때 –> 단독 사용시 부모 뷰가 제공하는 공간 내에서 최대 크기로 확장됨, 시각적 요소를 적용할 수 있는 하나의 뷰로 사용됨 ( 단, HStack, VStack 내에서 사용되는 경우 시각적 요소는 제외됨, 공간만 차지하는 역할, 단독으로 사용시 뷰가 없는 것처럼 취급됨.
import SwiftUI

struct ContentView: View {
    var body: some View {
        Spacer().background(Color.yellow)
    }

}
스택 외부에서 쓰였을 때만 배경색이 반영된다고 나왔으나 적용되지 않았습니다. 버전업데이트 되면서 바뀐듯???
- 스택 내부에서 사용될 때 –> 시각효과 무시됨
import SwiftUI

struct ContentView: View {
    var body: some View {
        HStack {
            Spacer().background(Color.blue)
            Text("hello").font(.title).background(Color.yellow)
        }
    }
}
[프리뷰 결과]
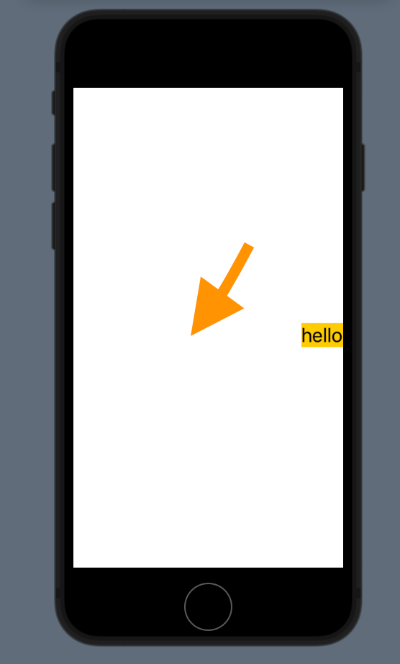
“hello” 텍스트 크기 영역을 제외한 왼쪽의 나머지 공간을 모두 차지하게됨, Spacer의 배경색 무시됨
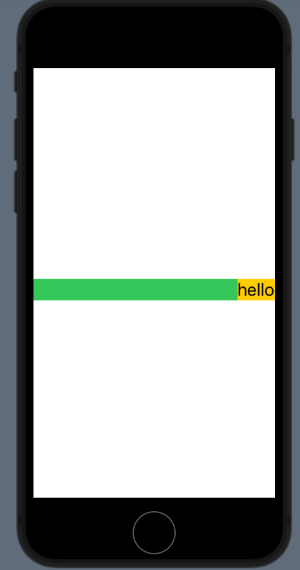
HStack {
    Spacer().background(Color.blue)
    Text("hello").font(.title).background(Color.yellow)
}.background(Color.green)
HStack의 배경색을 지정하면 Spacer가 차지하는 공간을 확인할 수 있음
Spacer의 길이 제한
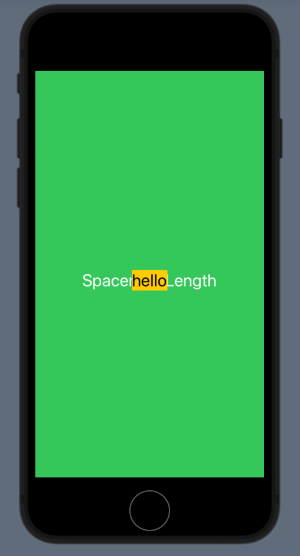
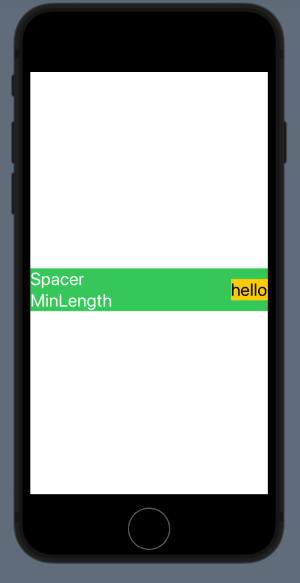
frame수식어를 사용하여 제한을 둘 수 있고, minLength의 값을 설정시 최소 간격을 지정할 수 있음
Spacer().frame(width: 100, height: 100)import SwiftUI
struct ContentView: View {
var body: some View {
HStack {
Text("Spacer MinLength").font(.title).foregroundColor(.white)
Spacer(minLength: 100)
Text("hello").font(.title).background(Color.yellow)
}.background(Color.green)
}
}

ZStack에서 Spacer를 대신할 수 있는 뷰
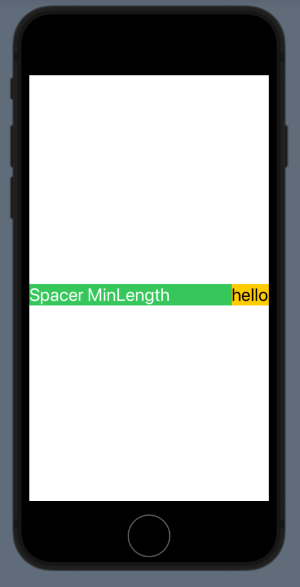
Color.clear 나 Rectangle 처럼 부모 뷰의 크기만큼 확장성 지닌 뷰
import SwiftUI

struct ContentView: View {
    var body: some View {
        ZStack {
            Color.clear
            Text("Spacer MinLength").font(.title).foregroundColor(.white)
//            Spacer()
            Text("hello").font(.title).background(Color.yellow)
        }.background(Color.green)
    }
}
<프리뷰 결과>
Color.clear를 사용하여 부모뷰 크기만큼 확장됨
Spacer를 이용한 배치방법 예제
import SwiftUI

struct ContentView: View {
    var body: some View {
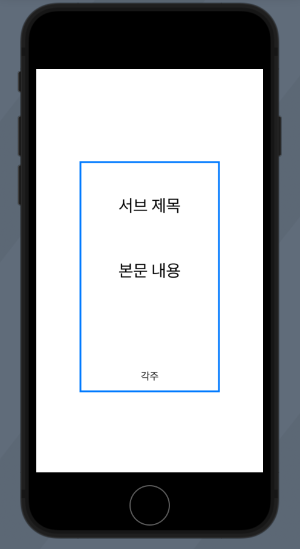
        VStack {
            Text("제목").font(.largeTitle).foregroundColor(.white)
            Text("서브 제목")
            Spacer()
            Text("본문 내용")
            Spacer()
            Spacer()
            Text("각주").font(.body)
        }.font(.title)
            .frame(width: 200, height: 350)
            .padding()
            .border(Color.blue, width:3)
    }
}
<프리뷰 결과>
Spacer는 다양한 형태로 사용될 수 있기 때문에 여러가지 테스트를 해보면서 감을 익혀야 합니다.
위 포스팅 내용들은 “스윗한 SwiftUI(이봉원 지음)” 전자책을 보고 스터디 및 실습한 내용들을 기록하였습니다.
