[Xcode] iOS앱을 만들기 위해 신규 프로젝트를 생성하는 방법
엑스코드 : 신규 앱 개발 프로젝트 생성하는 방법
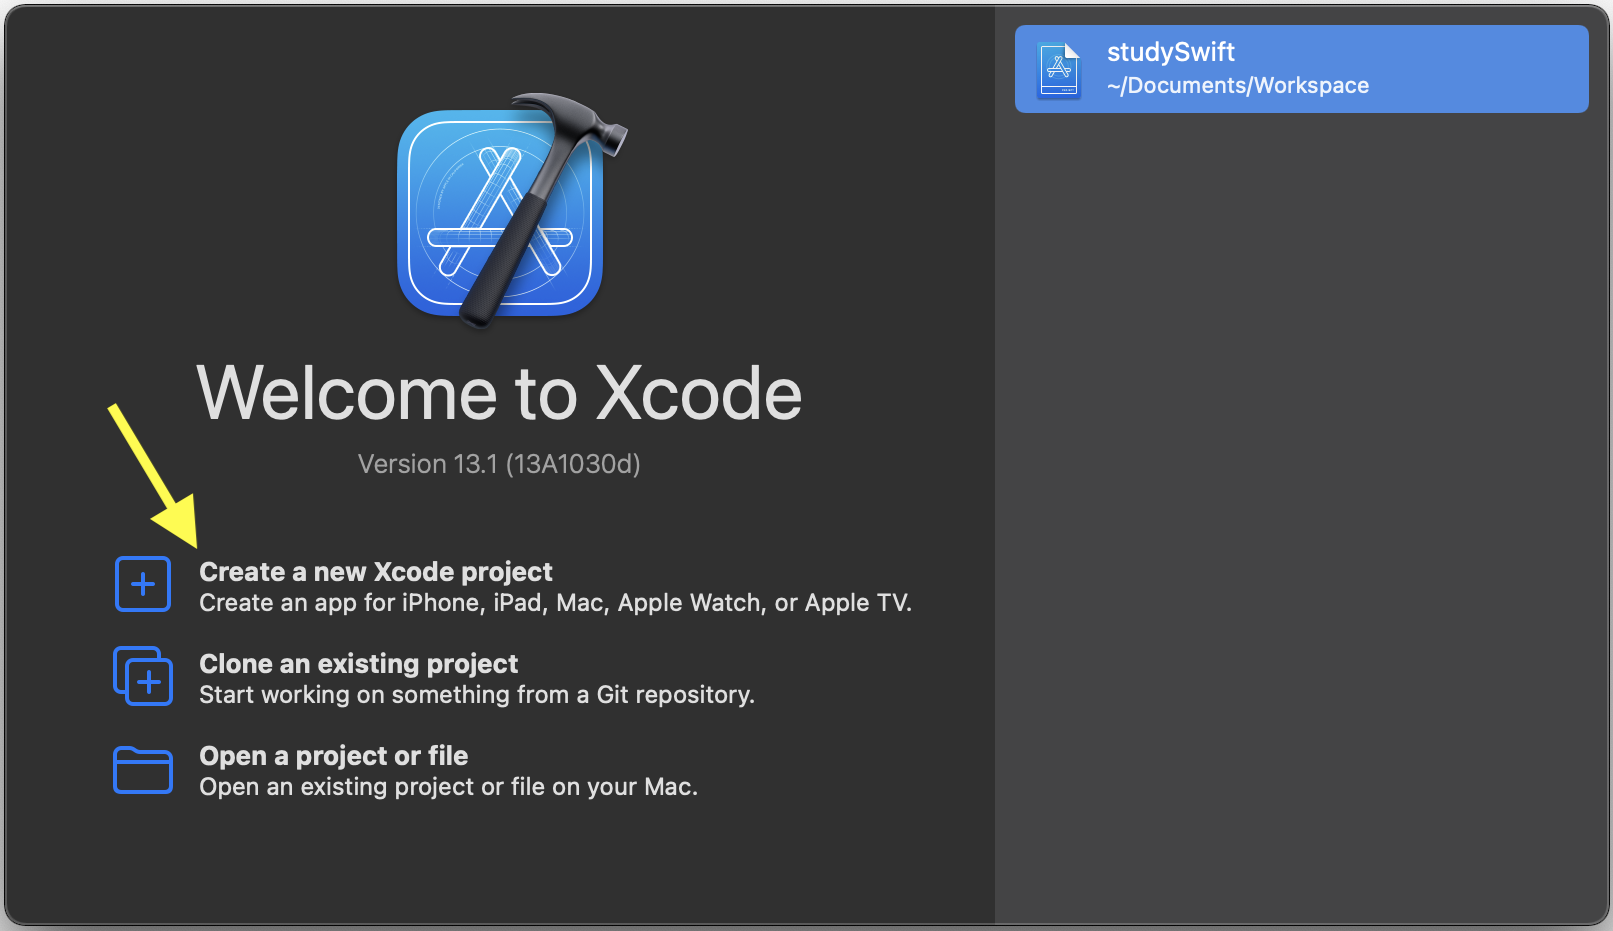
1. Xcode 툴을 실행합니다.
2. Create a new Xcode project를 클릭합니다.
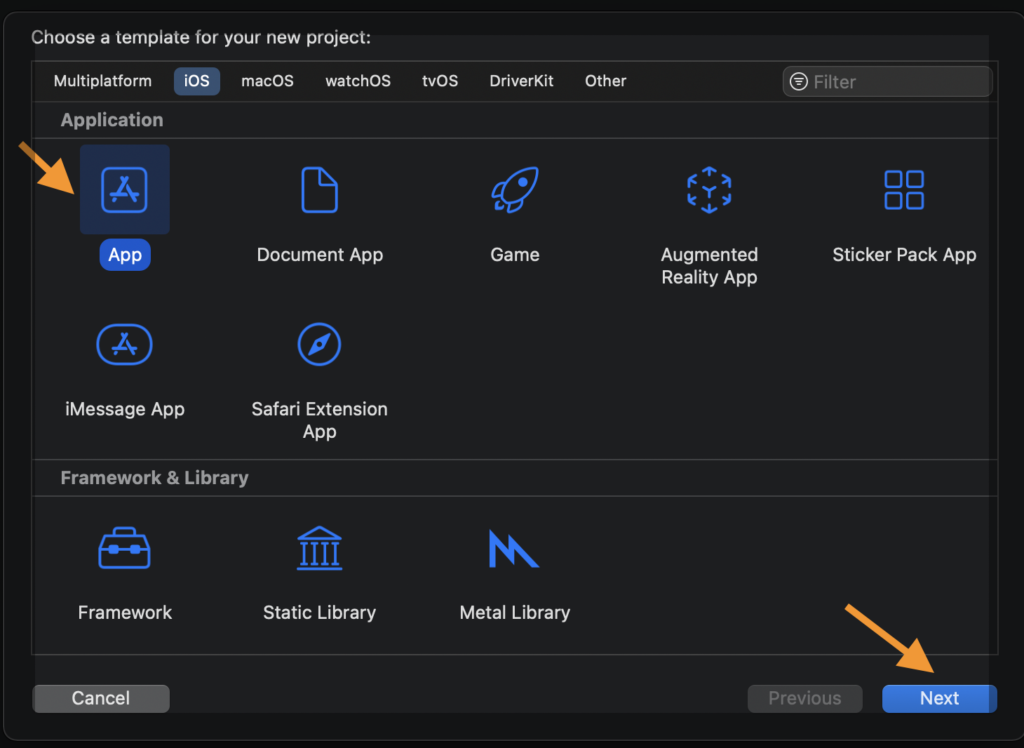
3. 템플릿을 선택하세요. iOS탭을 선택후 Application 영역에서 App를 선택한 후 Next 버튼을 클릭합니다.
4. 프로젝트 기본 옵션 설정을 진행합니다.
- Product Name을 입력합니다.
- Team : 개발자 프로그램을 등록했다면 선택가능합니다. 매년 $99달러를 지불하고 개발자 프로그램에 등록할 수 있습니다.
- Organization Identifier : 본인만의 식별코드 개념으로 이해하세요.( 나중에 앱스토어에 등록할 때 URL로 사용됩니다. )
- Bundle Identifier : 앱 구분을 위한 식별자입니다. Organization Identifier 식별코드와 닷(.)으로 연결하여 앱을 식별하는 URL 생성하게 됩니다. 앱 식별자라고 보시면 됩니다. 안드로이드의 경우 패키지명이 URL이 되는데 이와 비슷합니다.
- Interface : Storyboard를 선택하세요.
- Language : 개발언어로 Swift를 선택합니다.
- Use Core Data : iOS에서 제공하는 데이터 관리 툴킷 사용 여부입니다.
- Include Tests는 프로젝트 생성시 앱의 동작에 대한 테스트를 위해 테스트 포함 여부에 대한 선택입니다.
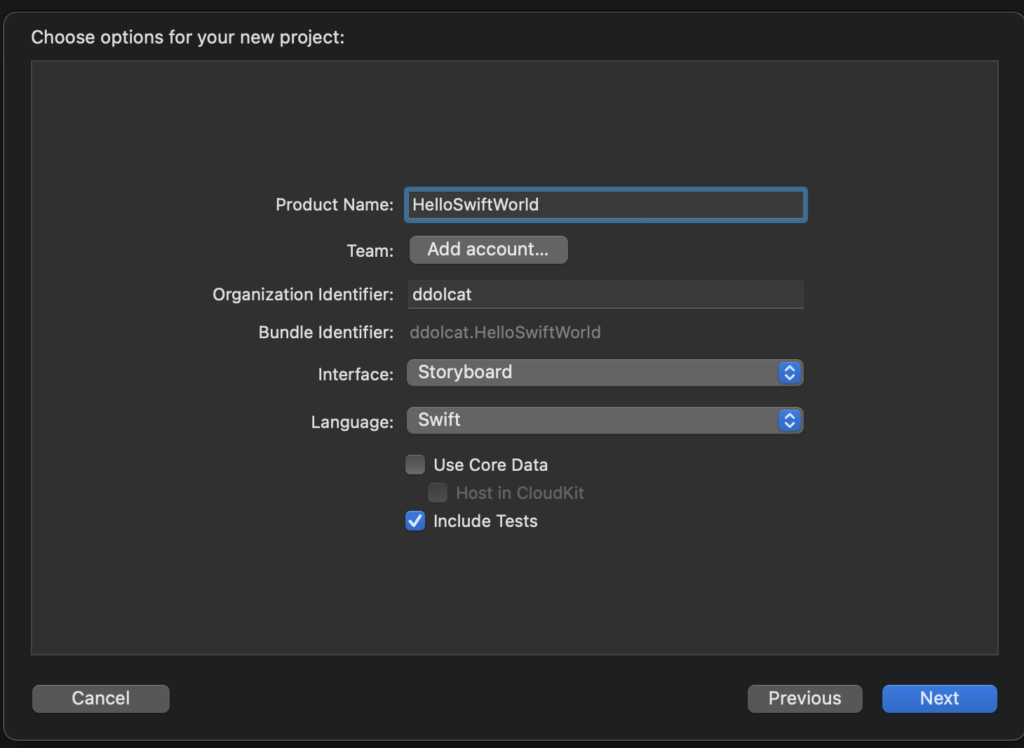
설정 완료 후 Next버튼을 클릭합니다.
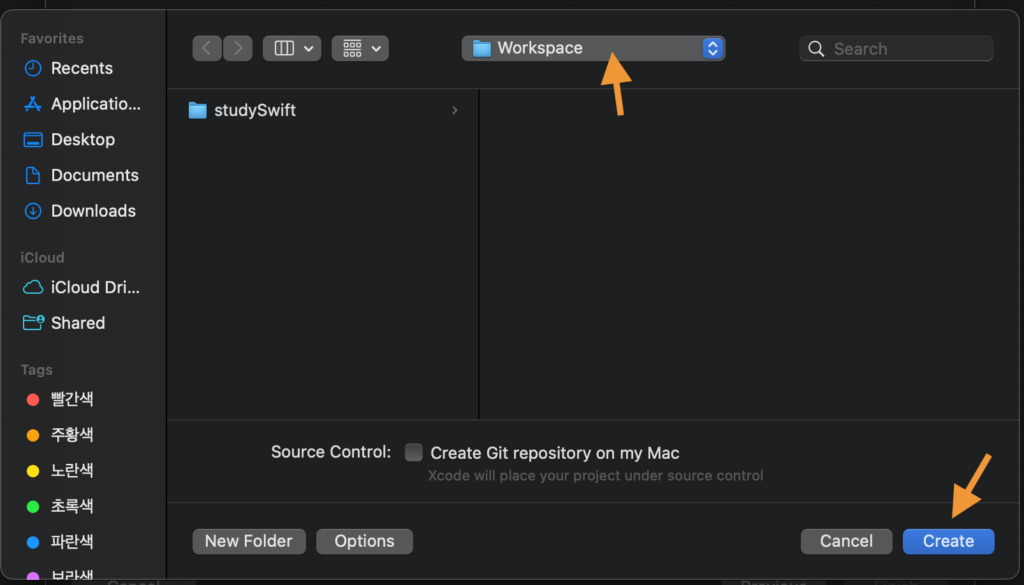
5. 프로젝트를 저장할 작업 폴더를 선택 후 Create버튼을 클릭합니다.
소스 코드를 저장할 깃 저장소가 있다면 Source Control를 체크 하시면 되요.
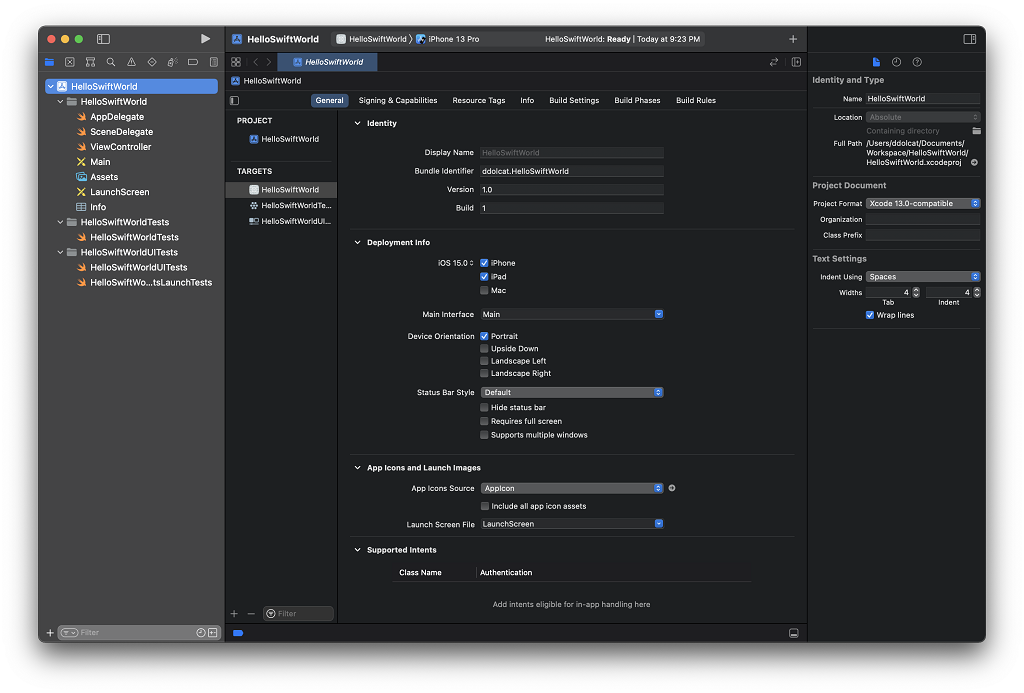
6. 프로젝트 생성완료입니다. 화면 왼쪽은 네비게이터 영역으로 프로젝트를 구성하는 파일들이 존재합니다.
- AppDelegate.swift : 앱의 기본적인 동작을 위한 이벤트관리, 서비스, 실행주기(Session Lifecycle ) 등을 관리하는 클래스 파일입니다. 앱 실행 및 종료, 백그라운드 실행 등의 작업을 관리합니다.
- ScenDelegate.swift : UILifeCycle에 대한 부분을 관리합니다.
- ViewController.swift : 화면뷰에 대한 소스코드 클래스로 개발자는 이 파일에서 코딩을 합니다. 안드로이드와 마찬가지로 뷰 하나당 Controller 클래스 파일 하나로 구성됩니다.
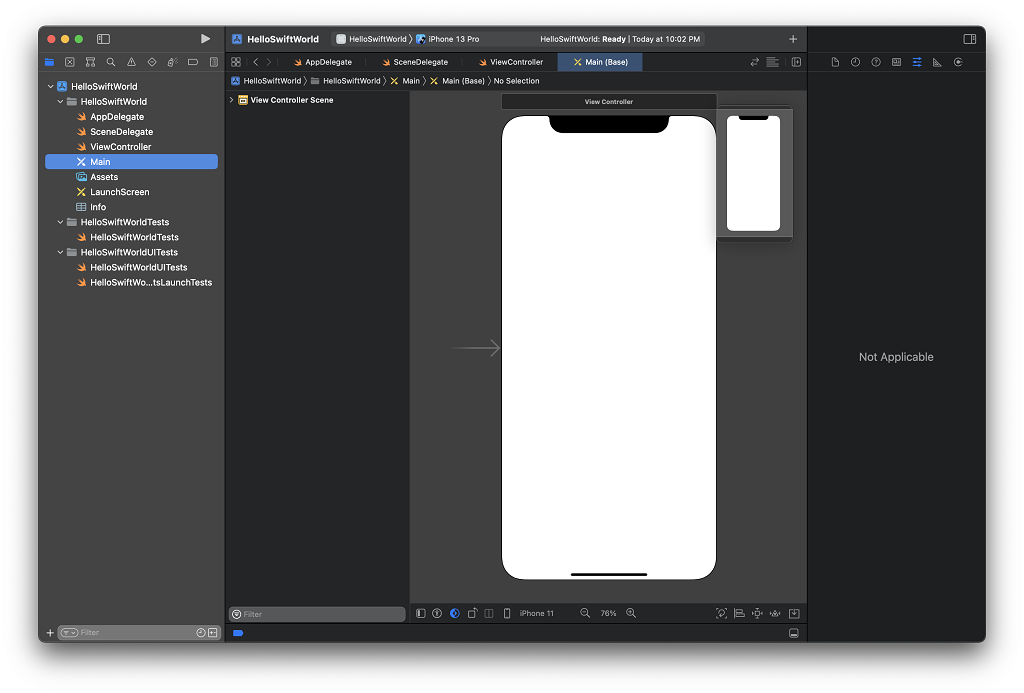
- Main.storyboard : UI로 구성된 뷰를 보여주는 파일입니다.
- Assets.xcassets : 앱 아이콘을 관리하는 폴더입니다.
- LunchScreen.storyboard : 앱 실행시 잠시 나타나는 스플래시 화면을 만드는 스토리보드입니다.
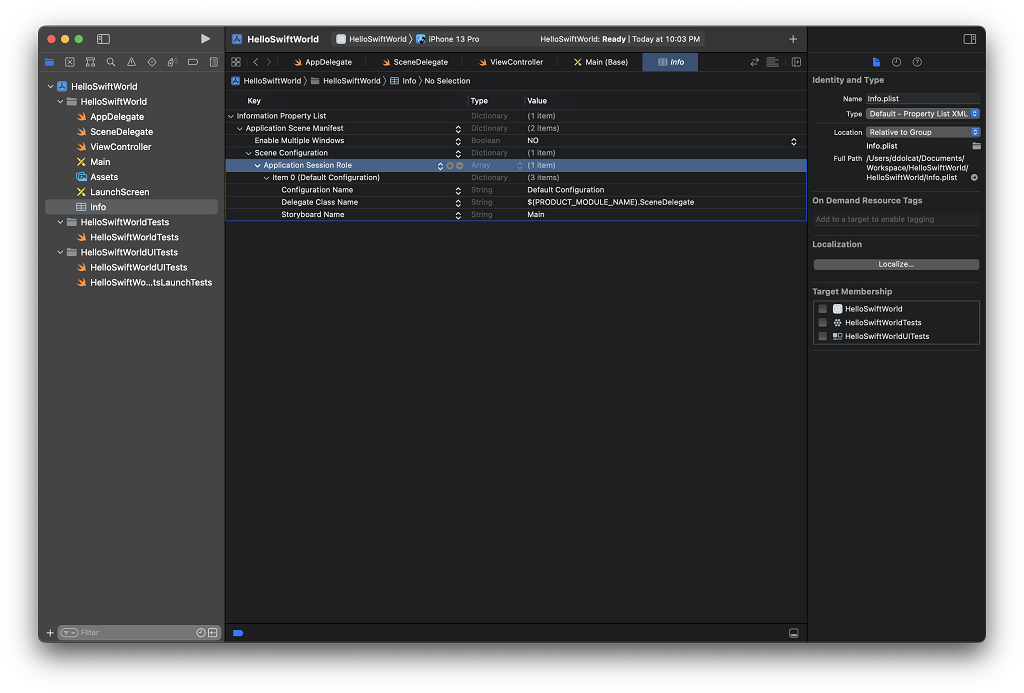
- Info.plist : 앱이 실행되는데 필요한 정보를 관리합니다.
프로젝트 생성시 기본적으로 구성된 클래스 파일의 코드는 다음과 같습니다.
AppDelegate.swift
//
//  AppDelegate.swift
//  HelloSwiftWorld
//
//  Created by .... on 2021/12/16.
//

import UIKit

@main
class AppDelegate: UIResponder, UIApplicationDelegate {


    func application(_ application: UIApplication, didFinishLaunchingWithOptions launchOptions: [UIApplication.LaunchOptionsKey: Any]?) -> Bool {
        // Override point for customization after application launch.
        return true
    }

    // MARK: UISceneSession Lifecycle

    func application(_ application: UIApplication, configurationForConnecting connectingSceneSession: UISceneSession, options: UIScene.ConnectionOptions) -> UISceneConfiguration {
        // Called when a new scene session is being created.
        // Use this method to select a configuration to create the new scene with.
        return UISceneConfiguration(name: "Default Configuration", sessionRole: connectingSceneSession.role)
    }

    func application(_ application: UIApplication, didDiscardSceneSessions sceneSessions: Set<UISceneSession>) {
        // Called when the user discards a scene session.
        // If any sessions were discarded while the application was not running, this will be called shortly after application:didFinishLaunchingWithOptions.
        // Use this method to release any resources that were specific to the discarded scenes, as they will not return.
    }


}
SceneDelegate.swift
//
//  SceneDelegate.swift
//  HelloSwiftWorld
//
//  Created by ..... on 2021/12/16.
//

import UIKit

class SceneDelegate: UIResponder, UIWindowSceneDelegate {

    var window: UIWindow?


    func scene(_ scene: UIScene, willConnectTo session: UISceneSession, options connectionOptions: UIScene.ConnectionOptions) {
        // Use this method to optionally configure and attach the UIWindow `window` to the provided UIWindowScene `scene`.
        // If using a storyboard, the `window` property will automatically be initialized and attached to the scene.
        // This delegate does not imply the connecting scene or session are new (see `application:configurationForConnectingSceneSession` instead).
        guard let _ = (scene as? UIWindowScene) else { return }
    }

    func sceneDidDisconnect(_ scene: UIScene) {
        // Called as the scene is being released by the system.
        // This occurs shortly after the scene enters the background, or when its session is discarded.
        // Release any resources associated with this scene that can be re-created the next time the scene connects.
        // The scene may re-connect later, as its session was not necessarily discarded (see `application:didDiscardSceneSessions` instead).
    }

    func sceneDidBecomeActive(_ scene: UIScene) {
        // Called when the scene has moved from an inactive state to an active state.
        // Use this method to restart any tasks that were paused (or not yet started) when the scene was inactive.
    }

    func sceneWillResignActive(_ scene: UIScene) {
        // Called when the scene will move from an active state to an inactive state.
        // This may occur due to temporary interruptions (ex. an incoming phone call).
    }

    func sceneWillEnterForeground(_ scene: UIScene) {
        // Called as the scene transitions from the background to the foreground.
        // Use this method to undo the changes made on entering the background.
    }

    func sceneDidEnterBackground(_ scene: UIScene) {
        // Called as the scene transitions from the foreground to the background.
        // Use this method to save data, release shared resources, and store enough scene-specific state information
        // to restore the scene back to its current state.
    }


}
ViewController.swift
//
//  ViewController.swift
//  HelloSwiftWorld
//
//  Created by ...... on 2021/12/16.
//

import UIKit

class ViewController: UIViewController {

    override func viewDidLoad() {
        super.viewDidLoad()
        // Do any additional setup after loading the view.
    }


}
Main.storyboard
Info.plist
HelloSwfitWorldTests.swift
//
//  HelloSwiftWorldTests.swift
//  HelloSwiftWorldTests
//
//  Created by .... on 2021/12/16.
//

import XCTest
@testable import HelloSwiftWorld

class HelloSwiftWorldTests: XCTestCase {

    override func setUpWithError() throws {
        // Put setup code here. This method is called before the invocation of each test method in the class.
    }

    override func tearDownWithError() throws {
        // Put teardown code here. This method is called after the invocation of each test method in the class.
    }

    func testExample() throws {
        // This is an example of a functional test case.
        // Use XCTAssert and related functions to verify your tests produce the correct results.
    }

    func testPerformanceExample() throws {
        // This is an example of a performance test case.
        self.measure {
            // Put the code you want to measure the time of here.
        }
    }

}
HelloSwiftWorldUITests.swift
//
//  HelloSwiftWorldUITests.swift
//  HelloSwiftWorldUITests
//
//  Created by .... on 2021/12/16.
//

import XCTest

class HelloSwiftWorldUITests: XCTestCase {

    override func setUpWithError() throws {
        // Put setup code here. This method is called before the invocation of each test method in the class.

        // In UI tests it is usually best to stop immediately when a failure occurs.
        continueAfterFailure = false

        // In UI tests it’s important to set the initial state - such as interface orientation - required for your tests before they run. The setUp method is a good place to do this.
    }

    override func tearDownWithError() throws {
        // Put teardown code here. This method is called after the invocation of each test method in the class.
    }

    func testExample() throws {
        // UI tests must launch the application that they test.
        let app = XCUIApplication()
        app.launch()

        // Use recording to get started writing UI tests.
        // Use XCTAssert and related functions to verify your tests produce the correct results.
    }

    func testLaunchPerformance() throws {
        if #available(macOS 10.15, iOS 13.0, tvOS 13.0, watchOS 7.0, *) {
            // This measures how long it takes to launch your application.
            measure(metrics: [XCTApplicationLaunchMetric()]) {
                XCUIApplication().launch()
            }
        }
    }
}
HelloSwiftWorldUITestsLaunchTests.swift
//
//  HelloSwiftWorldUITestsLaunchTests.swift
//  HelloSwiftWorldUITests
//
//  Created by ...... on 2021/12/16.
//

import XCTest

class HelloSwiftWorldUITestsLaunchTests: XCTestCase {

    override class var runsForEachTargetApplicationUIConfiguration: Bool {
        true
    }

    override func setUpWithError() throws {
        continueAfterFailure = false
    }

    func testLaunch() throws {
        let app = XCUIApplication()
        app.launch()

        // Insert steps here to perform after app launch but before taking a screenshot,
        // such as logging into a test account or navigating somewhere in the app

        let attachment = XCTAttachment(screenshot: app.screenshot())
        attachment.name = "Launch Screen"
        attachment.lifetime = .keepAlways
        add(attachment)
    }
}
[더 보기]
[iOS] 엑스코드 (Xcode) 사용법 알아보기 및 플레이그라운드(Playground) 실행방법 / 단축키
엑스코드 기본 사용법에 대해 알아봅니다. 신규프로젝트 생성방법 아래글을 참고하세요. 애플 앱 개발을 위한 좌충우돌 Xcode 설치 (macOS Monterey beta로 업그레이드도 함께!!! ) iOS 어플 개발을 위해
playground.naragara.com
앱 개발을 위해 맥북 M1 PRO 16인치를 구입하였다. 도착 예정일은 12월 2일이다. 2021년 11월 16일 맥북 프로 16인치를 주문하였다. 애플의 첫 M1시리즈 제품인 맥북 M1 13인치 모델을 구입하려고 하였으나, 13인치는 너무 작아서 개발을 해도 불편하고 웹서핑, 블로그를 써도 불편 playground.naragara.com 맥북프로 16인치 M1 PRO 개봉기(언박싱) 오후 12시 무렵에 우체국으로 부터 소포우편물이 도착했어요. 2021년 11월 16일에 주문을 넣었던 맥북 M1 PRO 16인치가 드디어 도착했네요. 콧 노래가 절로 나오더라구요. 생에 처음으로 구입해보는 playground.naragara.com
[REFERENCE]
- 이지스퍼블리싱 : Do it!스위프트로 아이폰 앱 만들기(입문)
- https://velog.io/@dev-lena/iOS-AppDelegate%EC%99%80-SceneDelegate