[Android 12] 커스텀 알림 레이아웃 적용하기
안드로이드 12부터는 푸시알림(노티) 혹은 포그라운드서비스 알림을 사용하는 경우
알림창 사이즈가 축소된다. 전체 알림영역을 사용하지 않게 변경되어 기존에 만든 커스텀 알림 layout이 혼자 따로 노는 듯 한 모습을 보게 된다. 구글에서도 따로 노는 알림영역의 layout이 보기 싫었나 보다.
개발자 문서를 확인해보니 역시나 변경되는 부분이 생겼다.
가이드 문서대로 적용한다면 모든 알림이 통일성이 생겨서 이뻐(?) 보이긴 할 것이다.
동작 변경사항: Android 12를 타겟팅하는 앱
Android 12에서는 완전한 맞춤 알림의 모양과 동작을 변경합니다. 이전에는 맞춤 알림이 전체 알림 영역을 사용하여 자체 레이아웃과 스타일을 제공했습니다. 이로 인해 사용자에게 혼동을 주거나 다양한 기기에서 레이아웃 호환성 문제를 일으킬 수 있는 안티패턴이 생겼습니다.
Android 12를 타겟팅하는 앱의 경우 맞춤 콘텐츠 뷰가 포함된 알림은 더 이상 전체 알림 영역을 사용하지 않습니다. 대신 시스템에서 표준 템플릿을 적용합니다. 이 템플릿은 맞춤 알림이 알림의 아이콘 및 확장 어포던스(접힌 상태)와 알림의 아이콘, 앱 이름, 축소 어포던스(펼친 상태) 등 모든 상태에서 다른 알림과 동일한 장식을 보유하도록 합니다. 이 동작은 Notification.DecoratedCustomViewStyle의 동작과 거의 동일합니다.
이러한 방식을 통해 Android 12는 모든 알림이 시각적으로 일관되고 쉽게 검색되도록 하며 사용자에게 검색 가능하고 친숙한 알림 확장 기능을 제공합니다.
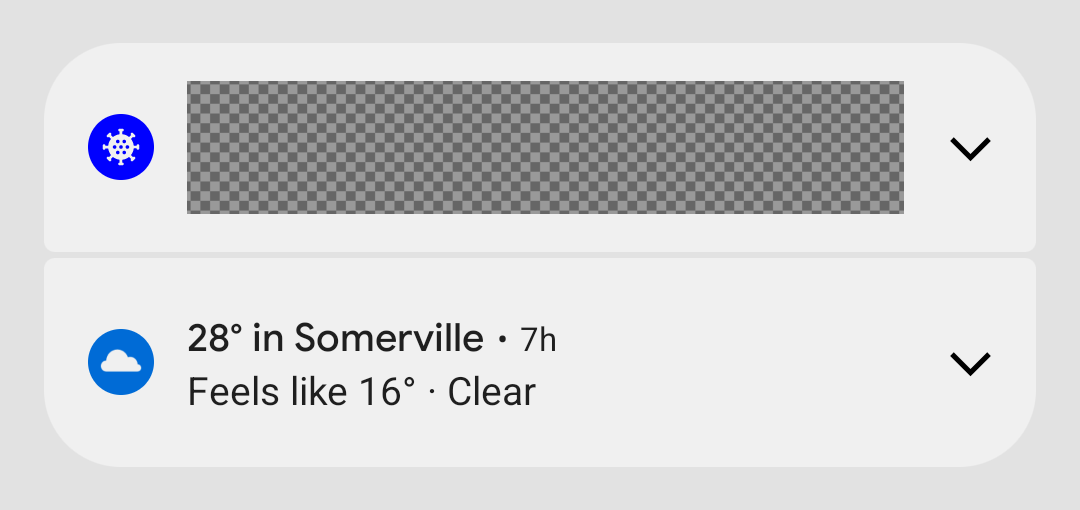
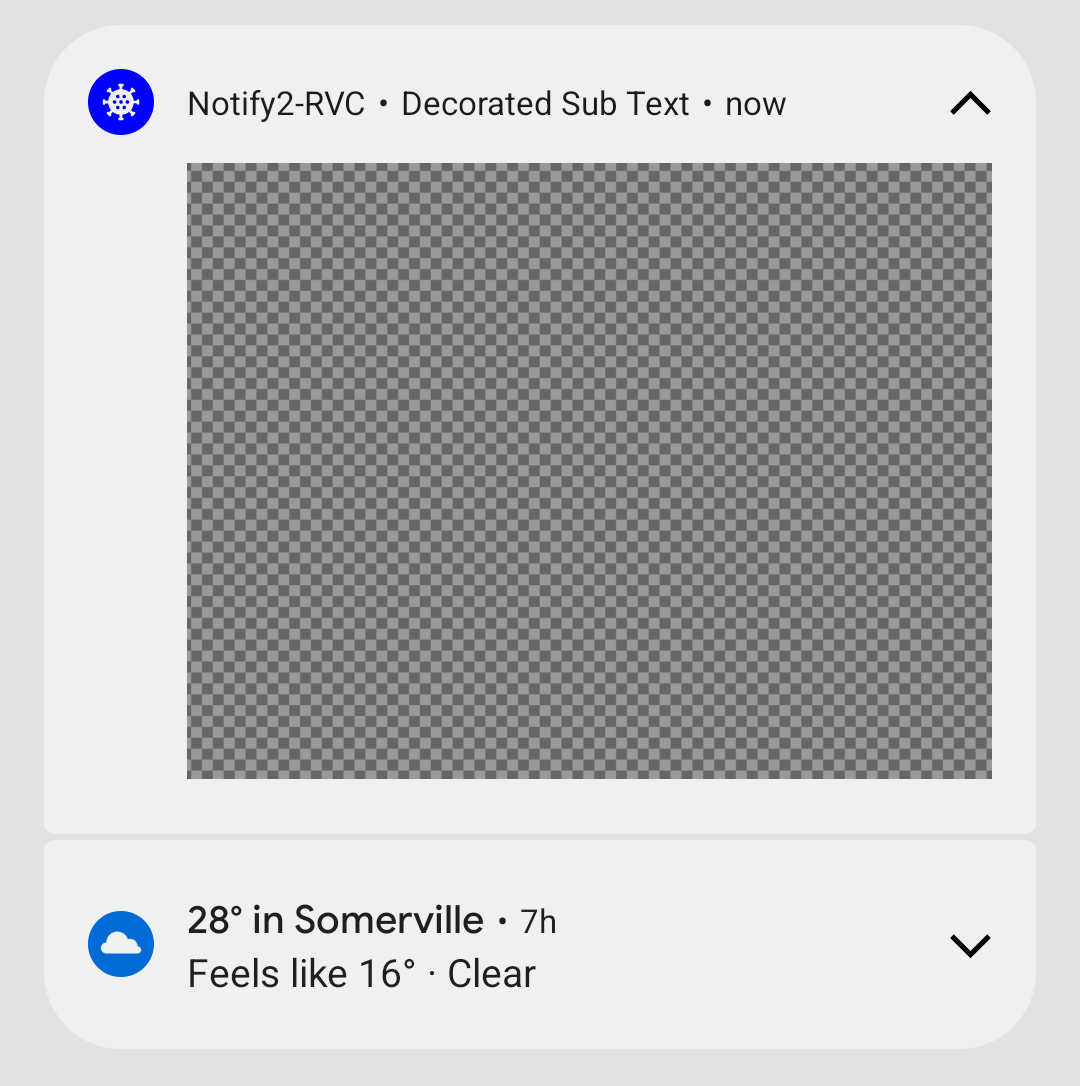
다음 그림은 표준 템플릿의 맞춤 알림을 보여 줍니다.
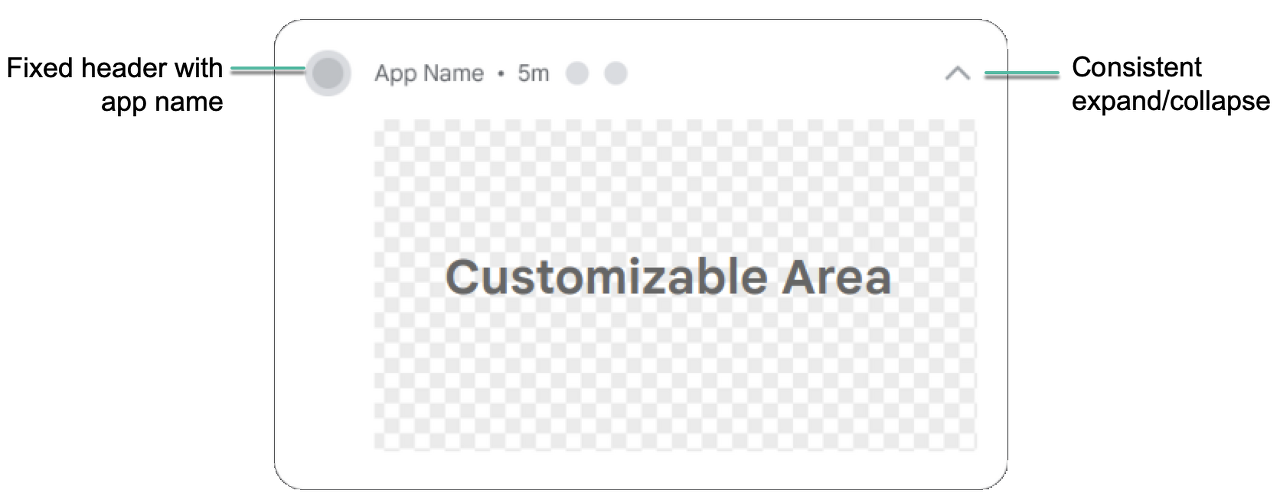
다음 예는 맞춤 알림이 접힌 상태와 펼친 상태로 렌더링되는 방식을 보여 줍니다.
Android 12의 변경사항은 Notification.Style의 맞춤 서브클래스를 정의하거나 Notification.Builder의 메서드 setCustomContentView(RemoteViews), setCustomBigContentView(RemoteViews), setCustomHeadsUpContentView(RemoteViews)를 사용하는 앱에 영향을 줍니다.
앱이 완전한 맞춤 알림을 사용하면 가능한 한 빨리 새 템플릿으로 테스트하는 것이 좋습니다.
- 맞춤 알림 변경 사용 설정
- 앱의 targetSdkVersion을 S로 변경하여 새 동작을 사용 설정합니다.
- 다시 컴파일합니다.
- Android 12를 실행하는 기기나 에뮬레이터에 앱을 설치합니다.
- 맞춤 뷰를 사용하는 알림을 모두 테스트하여 예상대로 알림 창에 표시되는지 확인합니다. 테스트하는 동안 다음 사항을 고려하여 필요에 따라 조정합니다.
- 맞춤 뷰의 크기가 변경되었습니다. 일반적으로 맞춤 알림에 제공되는 높이가 이전보다 낮습니다. 접힌 상태에서 맞춤 콘텐츠의 최대 높이가 106dp에서 48dp로 줄었습니다. 가로 공간도 더 적습니다.
- Android 12를 타겟팅하는 앱의 경우 모든 알림이 확장 가능합니다. 일반적으로 이는 setCustomContentView를 사용하는 경우 setBigCustomContentView도 사용하여 접힌 상태와 펼쳐진 상태가 일관되도록 하는 것이 좋다는 의미입니다.
- ‘보행 중 주의 알림’ 상태가 예상대로 표시되도록 하려면 알림 채널의 중요도를 ‘HIGH'(화면에 표시)로 올려야 합니다.
콘텐츠 영역의 맞춤 레이아웃 만들기
맞춤 레이아웃이 필요한 경우 알림에 NotificationCompat.DecoratedCustomViewStyle을 적용할 수 있습니다. 이 API를 사용하면 알림 아이콘, 타임스탬프, 하위 텍스트, 작업 버튼에 시스템 데코레이션을 사용하면서 일반적으로 제목과 텍스트 콘텐츠가 차지하는 콘텐츠 영역에 맞춤 레이아웃을 제공할 수 있습니다.
이 API는 다음과 같이 기본 알림 레이아웃을 기반으로 작성되어 확장 가능한 알림 템플릿과 유사하게 작동합니다.
- NotificationCompat.Builder로 기본 알림을 빌드합니다.
- setStyle()을 호출하여 NotificationCompat.DecoratedCustomViewStyle의 인스턴스를 전달합니다.
- 맞춤 레이아웃을 RemoteViews의 인스턴스로 확장합니다.
- setCustomContentView()를 호출하여 접힌 알림의 레이아웃을 설정합니다.
- 선택적으로 setCustomBigContentView()를 호출하여 펼쳐진 알림에 다른 레이아웃을 설정합니다.
    // Get the layouts to use in the custom notification
    RemoteViews notificationLayout = new RemoteViews(getPackageName(), R.layout.notification_small);
    RemoteViews notificationLayoutExpanded = new RemoteViews(getPackageName(), R.layout.notification_large);

    // Apply the layouts to the notification
    Notification customNotification = new NotificationCompat.Builder(context, CHANNEL_ID)
            .setSmallIcon(R.drawable.notification_icon)
            .setStyle(new NotificationCompat.DecoratedCustomViewStyle())
            .setCustomContentView(notificationLayout)
            .setCustomBigContentView(notificationLayoutExpanded)
            .build();
알림의 배경 색상은 기기 및 버전에 따라 다를 수 있습니다. 따라서, 맞춤 레이아웃의 텍스트와 제목에는 각각 TextAppearance_Compat_Notification 및 TextAppearance_Compat_Notification_Title과 같은 지원 라이브러리 스타일을 항상 적용해야 합니다. 이러한 스타일은 색상 변화에 맞게 조정되므로 검은색 배경에 검은색 텍스트나 흰색 배경에 흰색 텍스트로 표시되지 않습니다
    <TextView
        android:layout_width="wrap_content"
        android:layout_height="match_parent"
        android:layout_weight="1"
        android:text="@string/notification_title"
        android:id="@+id/notification_title"
        style="@style/TextAppearance.Compat.Notification.Title" />
또한, 텍스트 색상을 읽을 수 없게 되므로 RemoteViews 객체에 배경 이미지를 설정하지 마세요.
완전한 맞춤 알림 레이아웃 만들기
표준 알림 아이콘 및 헤더로 알림에 데코레이션을 적용하지 않으려면 위의 단계에 따라 setCustomBigContentView()를 사용하되 setStyle()을 호출하지 마세요.
주의: 알림이 나머지 알림과 일치하지 않고 알림 영역에 다른 스타일을 적용하는 여러 기기에서 중대한 레이아웃 호환성 문제가 발생할 수 있으므로 데코레이션을 적용하지 않은 알림은 사용하지 않는 것이 좋습니다.
Android 4.1(API 수준 16) 이전의 Android 버전을 지원하려면 setContent()도 호출하여 동일한 RemoteViews 객체를 전달해야 합니다.
나는 다음과 같이 처리를 하였다.
백그라운드서비스에서 사용하는 알림 코드에 버전 체크 분기문을 추가하였다. 안드로이드 11까지는 문제 없기 때문이다.
if (Build.VERSION.SDK_INT >= Build.VERSION_CODES.S) {
    remoteViews = new RemoteViews(context.getPackageName(), R.layout.notification_31);
} else {
    remoteViews = new RemoteViews(context.getPackageName(), R.layout.notification_normal);
}
안드로이드12에서 새롭게 추가된 PendingIntent 플래그도 반드시 추가해 주어야 노티가 정상적으로 노출되니 꼭 추가해주자
//android 12
PendingIntent pendingIntent;
if (Build.VERSION.SDK_INT >= Build.VERSION_CODES.S) {
    pendingIntent = PendingIntent.getActivity(context, 0, newIntent, PendingIntent.FLAG_UPDATE_CURRENT | PendingIntent.FLAG_IMMUTABLE);
}else {
    pendingIntent = PendingIntent.getActivity(context, 0, newIntent , PendingIntent.FLAG_UPDATE_CURRENT);
}
다음 작업으로 노티관련 코드 작성부분 역시 안드로이드 버전별로 분기처리하였고
안드로이드 12에서 추가된 속성을 반영했다.
확장 알림 레이아웃도 생성하여 setCustomBigContentView()호출하여 적용했다.
한가지 주의할 점은 확장형 레이아웃을 역시 데이터 바이딩작업을 별도로 해주어야한다.
if (Build.VERSION.SDK_INT >= Build.VERSION_CODES.S) { // VERSION_CODES 31
    RemoteViews notificationLayoutExpanded = new RemoteViews(getPackageName(), R.layout.notification__expeand);
    int NOTIFICATION_ID = 3;
    String CHANNEL_ID = "custom-status_bar";
    NotificationChannel channel = new NotificationChannel(CHANNEL_ID,
            context.getResources().getString(R.string.content_txt_43),
            NotificationManager.IMPORTANCE_NONE);//.IMPORTANCE_HIGH);//IMPORTANCE_LOW);

    ((NotificationManager) getSystemService(Context.NOTIFICATION_SERVICE)).createNotificationChannel(channel);

    Notification notification = new androidx.core.app.NotificationCompat.Builder(this, CHANNEL_ID)
            //.setContentTitle("") //자동표기됨
            .setAutoCancel(false)
            //.setWhen(System.currentTimeMillis())
            .setShowWhen(false)
            //.setLargeIcon(null)
            .setSmallIcon(getPngImage(level))
            .setContentIntent(pendingIntent)
            .setCustomContentView(remoteViews)
            .setStyle(new NotificationCompat.DecoratedCustomViewStyle())
//                        .setCustomHeadsUpContentView(remoteViews)  //롤리팜용
//                        .setPriority(NotificationCompat.PRIORITY_MAX)
//                        .setCustomBigContentView(notificationLayoutExpanded)
//                        .setSound(notificationSound)
//                        .setContent(remoteViews)
//                        .setTicker("test")
            .build();

    notification.flags |= Notification.FLAG_NO_CLEAR; // 지우기 버튼 눌렀을때 지워지지 않게

    startForeground(NOTIFICATION_ID, notification);
} else if (Build.VERSION.SDK_INT >= Build.VERSION_CODES.O) {
	.....이전 사용하는 코드 생략
}
다음 작업으로 안드로이드 12 이상에서 사용할 레이아웃 하나를 추가하였다. 표준을 적용하기 위해 백그라운드 색상과 텍스트 색상등을 모두 제거하였다. TextView를 사용할 때는 가이드 문서에 따라서 style=”@style/TextAppearance.Compat.Notification.Title” 속성을 추가하였다.
<?xml version="1.0" encoding="utf-8"?>
<LinearLayout xmlns:android="http://schemas.android.com/apk/res/android"
    android:orientation="vertical"
    android:layout_width="match_parent"
    android:layout_height="wrap_content"
    android:gravity="center">

    <LinearLayout
        android:id="@+id/bindicator"
        android:layout_width="match_parent"
        android:layout_height="wrap_content"
        android:orientation="vertical"
        android:gravity="center_vertical">

        <LinearLayout
            android:orientation="horizontal"
            android:layout_width="match_parent"
            android:layout_height="wrap_content"
            android:padding="5dp"
            android:gravity="left|center">

            <ImageView
                android:layout_width="30dp"
                android:layout_height="30dp"
                android:background="@mipmap/ic_launcher_round"
                android:layout_marginRight="2dp" />
             <LinearLayout
                android:layout_width="wrap_content"
                android:layout_height="wrap_content"
                android:gravity="center|left"
                android:layout_marginLeft="2dp"
                android:orientation="vertical">

                <TextView
                    style="@style/TextAppearance.Compat.Notification.Title"
                    android:layout_width="wrap_content"
                    android:layout_height="wrap_content"
                    android:textSize="11sp"
                    android:text="@string/c_4" />

                <LinearLayout
                    android:orientation="horizontal"
                    android:layout_width="wrap_content"
                    android:layout_height="wrap_content"
                    android:layout_marginRight="5dp"
                    android:gravity="left|center">


                    <TextView
                        style="@style/TextAppearance.Compat.Notification.Title"
                        android:textSize="17sp"
                        android:textStyle="bold"
                        android:id="@+id/batterylevel"
                        android:layout_width="wrap_content"
                        android:layout_height="wrap_content"
                        android:text="7%" />


                    <TextView
                        style="@style/TextAppearance.Compat.Notification.Title"
                        android:textSize="17sp"
                        android:layout_width="wrap_content"
                        android:layout_height="wrap_content"
                        android:paddingLeft="5dp"
                        android:paddingRight="5dp"
                        android:text="|" />

                    <TextView
                        style="@style/TextAppearance.Compat.Notification.Title"
                        android:textSize="17sp"
                        android:textStyle="bold"
                        android:id="@+id/topAreatemTxt"
                        android:layout_width="wrap_content"
                        android:layout_height="wrap_content"
                        android:text="7C" />


                    <TextView
                        style="@style/TextAppearance.Compat.Notification.Title"
                        android:textSize="17sp"
                        android:layout_width="wrap_content"
                        android:layout_height="wrap_content"
                        android:paddingLeft="5dp"
                        android:paddingRight="5dp"
                        android:text="|" />

                    <TextView
                        style="@style/TextAppearance.Compat.Notification.Title"
                        android:textSize="17sp"
                        android:textStyle="bold"
                        android:id="@+id/txt_volt"
                        android:layout_width="wrap_content"
                        android:layout_height="wrap_content"
                        android:text="12v" />

                    <TextView
                        style="@style/TextAppearance.Compat.Notification.Title"
                        android:textSize="17sp"
                        android:layout_width="wrap_content"
                        android:layout_height="wrap_content"
                        android:paddingLeft="5dp"
                        android:paddingRight="5dp"
                        android:text="|" />

                    <TextView
                        style="@style/TextAppearance.Compat.Notification.Title"
                        android:textSize="17sp"
                        android:textStyle="bold"
                        android:id="@+id/ampereTxt"
                        android:layout_width="wrap_content"
                        android:layout_height="wrap_content"
                        android:text="100mA" />

                </LinearLayout>

            </LinearLayout>
        </LinearLayout>

    </LinearLayout>


</LinearLayout>
오늘도 날씨가 너무 좋은 토요일이구나!!
아침 5시 30분 집사를 깨우는 고양이님 덕분에 아침부터 이러고 있다.
오늘은 광릉숲축제에 가 볼 예정이다.
알림 만들기 관련 개발자 문서
[REFERENCE]